
A client asked me to help with some enterprise software in Amazon Web Services (AWS) — and that meant getting back into Windows Server for the first time in a long while. Despite having been one of the first Microsoft Certified Systems Engineers in the UK, my certification expired long ago and I have no plans to renew it. But this was an interesting project in an industry vertical I know well, with people I like working with. Before diving into the client environment, I built out my own private Windows Server infrastructure on AWS to see what I was letting myself in for. What follows is an updated walkthrough for 2026, reflecting how the AWS free tier, Windows Server AMIs, and SSL tooling have all shifted since this guide was first written.
What you can do with this guide
- Set up a free-tier-eligible AWS account using a new domain name and email address.
- Install Windows Server 2022 in an Amazon EC2 instance, securely.
- Install Internet Information Services (IIS), Microsoft's web server.
- Add a Let's Encrypt SSL certificate, trusted and supported by all major browsers.
- Set the Let's Encrypt SSL certificate to auto-renew through a scheduled task.
- Install a modern browser on the server for local testing, since Internet Explorer is gone and Edge — while present — benefits from a backup option.
TL;DR — It is relatively straightforward to set up a free Windows Server-based web server with a Let's Encrypt SSL certificate on AWS EC2. There are a few hurdles, but once past them it works reliably.
Contents
- What you can do with this guide
- Before you start building a free Windows web server with a Let's Encrypt SSL certificate in AWS
- Installation and testing
- Create your AWS environment
- Install Windows Server 2022 in an Amazon EC2 instance
- Install Internet Information Services
- Add a Let's Encrypt SSL certificate
- Browser on the server: Edge, Chrome, or both
See also: Using AWS to bring Windows Server apps to the cloud
Before you start building a free Windows web server with a Let's Encrypt SSL certificate in AWS
AWS has restructured its free tier offering since this guide was first written. New customers now receive up to $200 in credits — $100 at sign-up, with up to $100 more available to earn — and the free plan runs for up to six months before any charges apply, provided you stay within its boundaries. There is also a substantial always-free tier covering more than 30 services. The old "750 hours per month for 12 months" framing for EC2 has evolved, so check the current AWS Free Tier page carefully before you begin, because the specifics of what is covered and for how long have changed. The principle remains the same: a new account gives you meaningful runway to build and test a Windows Server environment at no cost.
Installation and testing
Create your AWS environment
Create a fresh AWS account to take advantage of the current free tier offer. If you already have an active AWS account, the free tier credits and time-limited offers will not apply, so it is worth setting up a new one with a new domain and email address. This takes only a few minutes at any decent registrar.
Once your account is live, you can deploy a Windows Server Amazon Machine Image (AMI) into a free-tier-eligible instance type. The AWS console clearly flags these. Depending on your region, eligible instance types are typically t2.micro or t3.micro. Choose carefully — a Windows Server instance running outside the free tier will appear on your credit card bill promptly.
AWS has also significantly expanded its console and IAM tooling in recent years. Identity Centre (formerly SSO) is now the recommended way to manage access for anything beyond a personal lab, and hardware MFA options have broadened considerably. For a single-user lab, a straightforward IAM user with MFA enabled is still perfectly workable.
Install Windows Server 2022 in an Amazon EC2 instance
- Once your account is created, open the AWS console and navigate to EC2 — type
EC2in the search bar and star it as a favourite for easy access later. - Create a regular IAM user in addition to the root user, add that user to a group with full access to Amazon EC2 and nothing else, and enable Multi-Factor Authentication (MFA). A YubiKey USB-C security key works well here and is worth the modest outlay.
- In the EC2 console, choose 'Launch an instance'. Under 'Applications and OS Images', click 'Windows' and browse the Quick Start AMIs. Windows Server 2022 is the current long-term-supported release and is available as a free-tier-eligible AMI in most regions. Windows Server 2019 remains available if your workload specifically requires it, but 2022 is the sensible default for new builds in 2026.

AWS Console 'Launch an instance' page highlighting the free-tier-eligible Windows Server Amazon Machine Instance - Select your free-tier-eligible instance type and click 'Launch Instance'. The instance will be running within a couple of minutes.
- Select the instance in the console and click 'Actions → Connect'.

EC2 Console showing how to connect to an instance. - Decrypt the administrator password using your key pair, then download the Remote Desktop shortcut and open it to connect to your new Windows Server.

Downloading a Microsoft Remote Desktop (RDP) connection profile to connect to your new server's Windows interface.
One thing worth noting for 2026: AWS Systems Manager Session Manager has matured to the point where it is a credible alternative to RDP for server access, and it avoids the need to open port 3389 to the internet entirely. For a lab environment, RDP is still the quickest path, but if you are building anything that will persist, Session Manager is worth the small additional setup effort and is a meaningful security improvement.
Install Internet Information Services
- IIS remains essentially unchanged in its installation process across Windows Server versions. Open Server Manager, choose 'Add Roles and Features', skip the 'Before You Begin' screen, select 'Role-based or feature-based installation', and click through to the 'Select Server Roles' screen.
- Check 'Web Server (IIS)', accept any additional features prompted, and click through to 'Install'. IIS will be added to your server within moments.
- Once installed, verify it is working by opening a browser on the server and navigating to
http://localhost. You should see the default IIS welcome page.
Add a Let's Encrypt SSL certificate
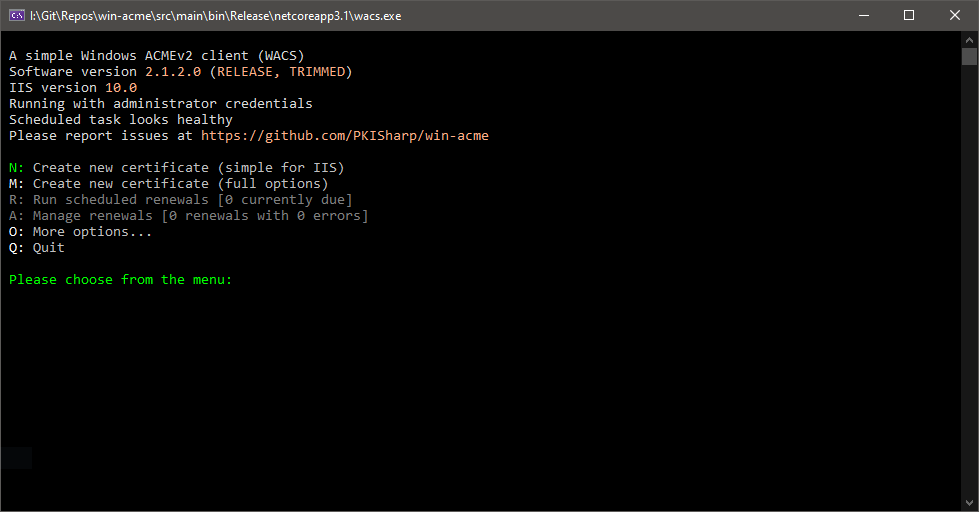
- Download win-acme, the Windows ACME client for Let's Encrypt. It remains the most straightforward way to get Let's Encrypt certificates onto a Windows Server running IIS, and it is actively maintained.
- Let's Encrypt certificates are free, browser-trusted, and auto-renewing. There is no longer any credible reason to purchase certificates for standard web server use — the ecosystem has moved decisively in this direction and major browsers have reinforced it.
- Before running win-acme, point your domain's DNS at the public IP address of your EC2 instance. For anything beyond a short-lived test, assign an Elastic IP address to your instance so the address does not change when the instance is stopped and restarted.
- Run win-acme from the command line and follow the prompts for IIS. It will validate your domain, issue the certificate, install it into IIS, and configure automatic renewal via a Windows scheduled task.
- Once complete, you should be able to reach your server over HTTPS from the internet, with a valid padlock in any major browser.
- To access the server correctly from within itself — rather than via localhost — add an entry to the
hostsfile atC:\Windows\System32\drivers\etc\hostsmapping your domain name to the server's local or loopback address. Local resolution checks the hosts file before DNS, which is perfectly adequate for a single-server lab.
Browser on the server: Edge, Chrome, or both
Internet Explorer is gone. Microsoft removed it from Windows Server in 2023, and it is no longer shipped or supported in any form. Windows Server 2022 ships with Microsoft Edge as the default browser, which is a significant improvement — Edge is a modern Chromium-based browser and is entirely usable for testing your IIS installation locally. You do not necessarily need to install anything additional.
That said, Edge on Windows Server still ships with some enhanced security configuration enabled by default (Internet Explorer Enhanced Security Configuration has been replaced by a similar feature in Edge for Server). If you find it too restrictive for local testing, you can adjust the settings in Edge directly, or install Google Chrome alongside it. For a lab environment, the choice is yours and neither option raises the security concerns that installing a third-party browser once did.
If you do want to install Chrome silently via PowerShell, the approach below still works. Read it before running it — it downloads and executes an installer from Google's servers:
$LocalTempDir = $env:TEMP; $ChromeInstaller = "ChromeInstaller.exe";
(new-object System.Net.WebClient).DownloadFile('http://dl.google.com/chrome/install/375.126/chrome_installer.exe', "$LocalTempDir\$ChromeInstaller");
& "$LocalTempDir\$ChromeInstaller" /silent /install; $Process2Monitor = "ChromeInstaller";
Do { $ProcessesFound = Get-Process | ?{$Process2Monitor -contains $_.Name} | Select-Object -ExpandProperty Name;
If ($ProcessesFound) { "Still running: $($ProcessesFound -join ', ')" | Write-Host; Start-Sleep -Seconds 2 }
else { rm "$LocalTempDir\$ChromeInstaller" -ErrorAction SilentlyContinue -Verbose } }
Until (!$ProcessesFound)
Let's Encrypt is a free, automated, and open certificate authority brought to you by the nonprofit Internet Security Research Group (ISRG).
The combination of AWS free tier credits, Windows Server 2022, IIS, and win-acme gives you a fully functional, SSL-secured Windows web server at effectively zero cost for the duration of your free tier eligibility. It is a solid foundation for learning, testing enterprise software, or simply refreshing skills that may have gone dormant — which, as it turns out, was exactly what I needed.