
RevenueCat remains the go-to solution for adding in-app purchases and subscriptions to FlutterFlow apps in 2026 — but the integration landscape has shifted meaningfully since the approach was first documented here. The core challenge hasn't changed: you're still wiring together systems from Apple, Google, RevenueCat, and FlutterFlow's own custom code layer. What has changed is that FlutterFlow now offers more mature support for custom actions and pub.dev packages, RevenueCat has expanded its dashboard and SDK capabilities, and both Apple and Google have updated their developer console workflows. This guide reflects the current state of all four platforms. I have this working in a published app on both the App Store and Google Play, and this article is my living documentation of how to get there.
TL:DR – Integrating in-app purchases into a FlutterFlow app in 2026 still requires patience and careful coordination across multiple platforms. The good news: FlutterFlow's custom code support has matured, RevenueCat's SDK is more stable, and the community knowledge base is much richer than it was a few years ago.
Contents
- What's changed in 2026
- Setting up App Store Connect, Google Play, and RevenueCat for in-app purchases in FlutterFlow apps
- RevenueCat
- Project settings
- Adding an app in RevenueCat
- App Store Connect
- In-app purchase products and shared secret
- Google Play
- Create Google Play credentials
- Google Cloud Console
- Create a Google service account
- Integrating RevenueCat into your FlutterFlow project
- Adding the purchases_flutter package
- Initialising RevenueCat via a custom action
- Triggering purchases and checking entitlements
- Testing in-app purchases
- Common pitfalls to watch for
- Final thoughts
What's changed in 2026
A few things are worth flagging before you dive in, especially if you've attempted this integration before and are returning to update an existing app.
- FlutterFlow custom actions: FlutterFlow has significantly improved its custom action editor and its support for importing pub.dev packages directly within the builder. This makes integrating the
purchases_flutterSDK from RevenueCat considerably smoother than it was in earlier iterations. You no longer need to export your project and manage the dependency entirely outside FlutterFlow in many cases. - RevenueCat SDK v7+: RevenueCat's Flutter SDK has moved through several major versions. As of 2026, the SDK uses a more streamlined initialisation pattern, improved error handling, and better support for StoreKit 2 on iOS. If you're following older tutorials that reference
Purchases.setup(), note that the API has evolved — the current method isPurchases.configure()with aPurchasesConfigurationobject. - Apple StoreKit 2: Apple has made StoreKit 2 the recommended framework for in-app purchases. RevenueCat handles this abstraction for you, but it does mean your App Store Connect setup and receipt validation flow look slightly different from older documentation. RevenueCat now uses a server-side approach that reduces reliance on the legacy shared secret in many configurations.
- Google Play Billing Library v6+: Google has continued to deprecate older billing library versions. RevenueCat's Android SDK keeps pace with this, but you need to ensure your FlutterFlow project targets a recent enough Android API level and that your
compileSdkVersionis current. FlutterFlow's default targets are generally kept up to date, but it's worth verifying in your project settings. - Google Play service account permissions: Google has tightened the required permissions for service accounts used with the Play Developer API. The roles needed have been refined — see the updated steps below.
Setting up App Store Connect, Google Play, and RevenueCat for in-app purchases in FlutterFlow apps
RevenueCat
Project settings
RevenueCat organises your monetisation around two key concepts: Entitlements, which define what a user gets access to when they pay, and Offerings, which define the set of products you present to them. This model hasn't changed, but the dashboard UI has been refreshed and the documentation is now considerably more thorough. You can read the current Entitlements documentation at https://www.revenuecat.com/docs/getting-started/entitlements.
RevenueCat has also introduced Paywalls — a remote-configurable UI layer that lets you change your paywall design without a new app submission. While FlutterFlow apps can technically use RevenueCat Paywalls via custom widgets, most FlutterFlow developers still build their paywall screens natively in the FlutterFlow canvas and trigger purchases via custom actions. Both approaches are valid.
Adding an app in RevenueCat
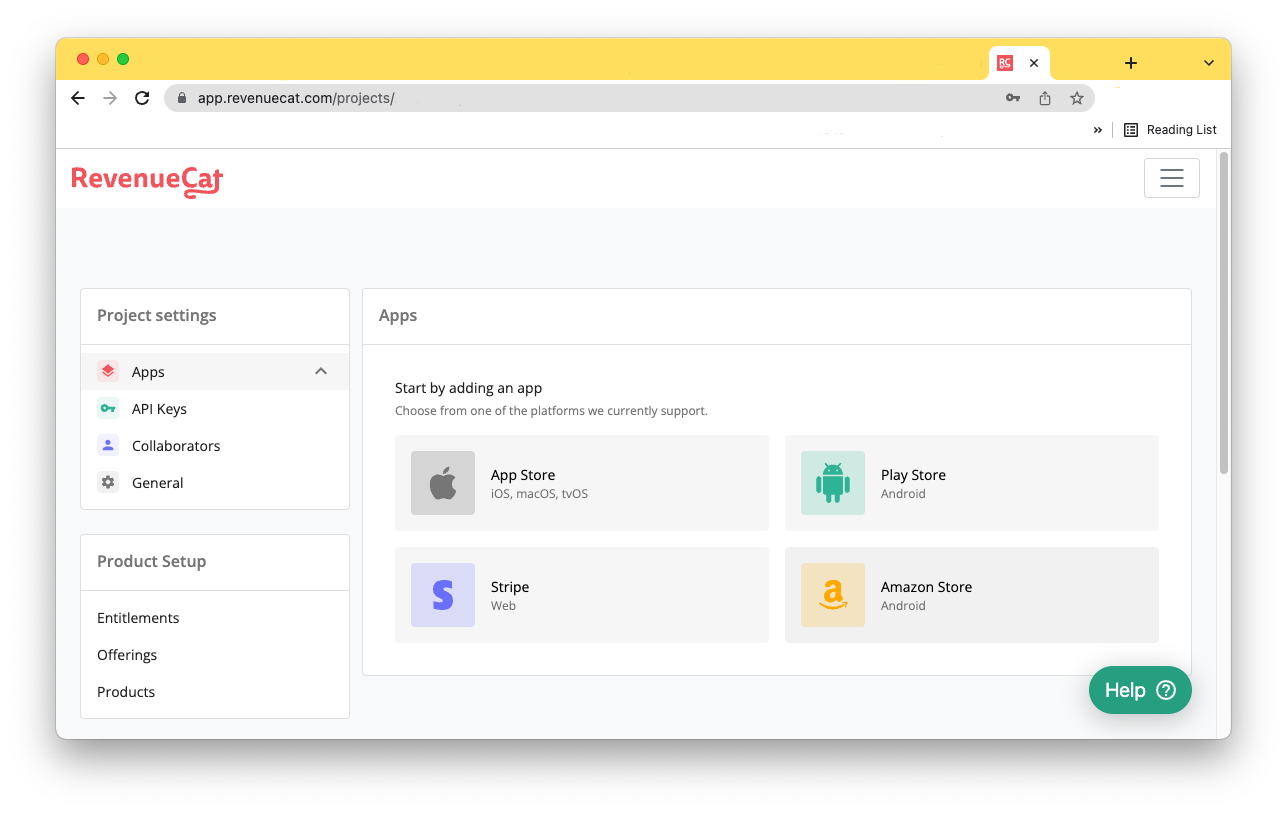
Navigate to the Apps section within your project in the RevenueCat dashboard. Add your iOS app and your Android app as separate entries. Each app requires its own API key, which you'll use when initialising the RevenueCat SDK in your FlutterFlow custom action. Product identifiers — the strings that link RevenueCat to Apple and Google — must match exactly what you've created in App Store Connect and the Google Play Console respectively. Precision matters here; a single character mismatch will cause silent failures that are painful to debug.
App Store Connect
In-app purchase products and shared secret
Apple's App Store Connect interface for in-app purchases has been reorganised as part of the broader shift to StoreKit 2. The navigation has changed from previous versions, so older screenshots may not match what you see today.
- Log in to App Store Connect at appstoreconnect.apple.com.
- Navigate to your app, then select Monetisation from the left-hand menu (this was previously labelled "In-App Purchases" in older versions of the console).
- Create your subscription products or one-time purchases here, noting the product identifier for each.
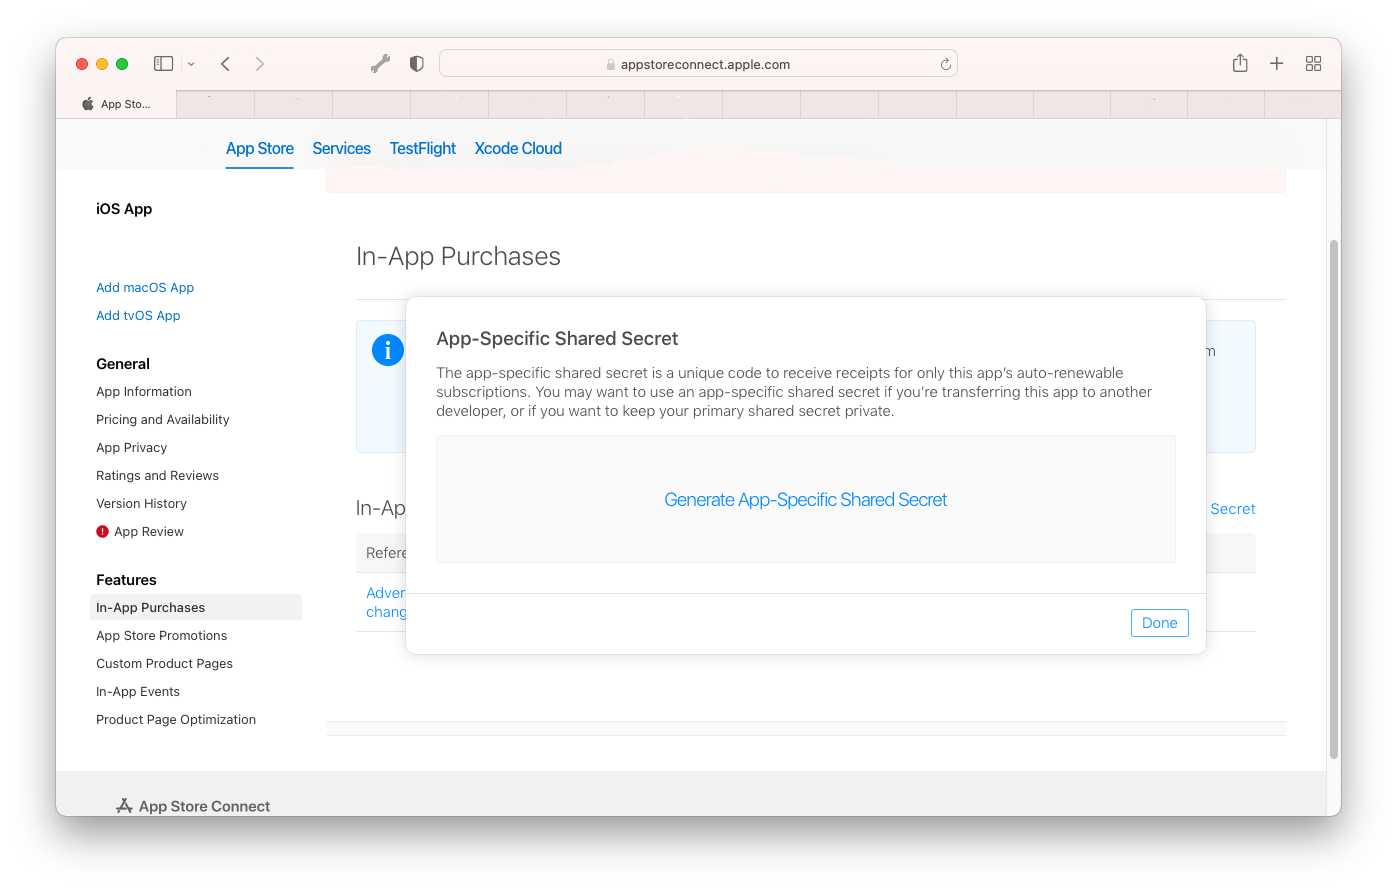
- To generate an App-Specific Shared Secret, go to Subscriptions and look for the App-Specific Shared Secret option. This is still required for legacy receipt validation, though RevenueCat is progressively moving toward server-to-server validation that reduces dependence on it.
- Generate and copy the shared secret.
- In RevenueCat, open your iOS app settings and paste the shared secret into the appropriate field.
You'll also need to confirm that your app has the In-App Purchase capability enabled in App Store Connect under your app's general settings, and that your paid applications agreement is active. No purchases will process without an active agreement — this catches people out more often than it should.
Google Play
Create Google Play credentials
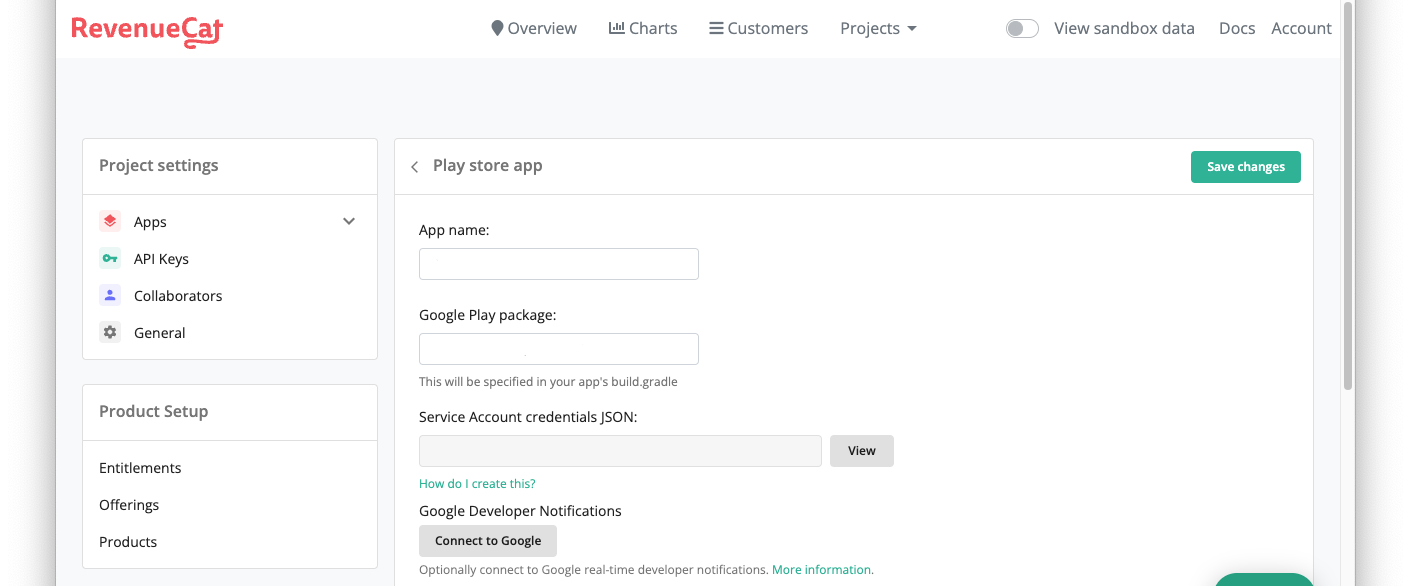
In your Android app settings in RevenueCat, add the Google Play app name and package name. You'll also need to create a service account in Google Cloud and upload its credentials JSON. This remains the most involved part of the entire setup, and the steps below reflect the current Google Play Console and Google Cloud Console interfaces as of 2026.
Google Cloud Console
Create a Google service account
This section requires you to work across both the Google Play Console and the Google Cloud Console. It is genuinely fiddly, but following the steps in order makes it manageable.
- In the Google Play Console, navigate to Setup > API access.
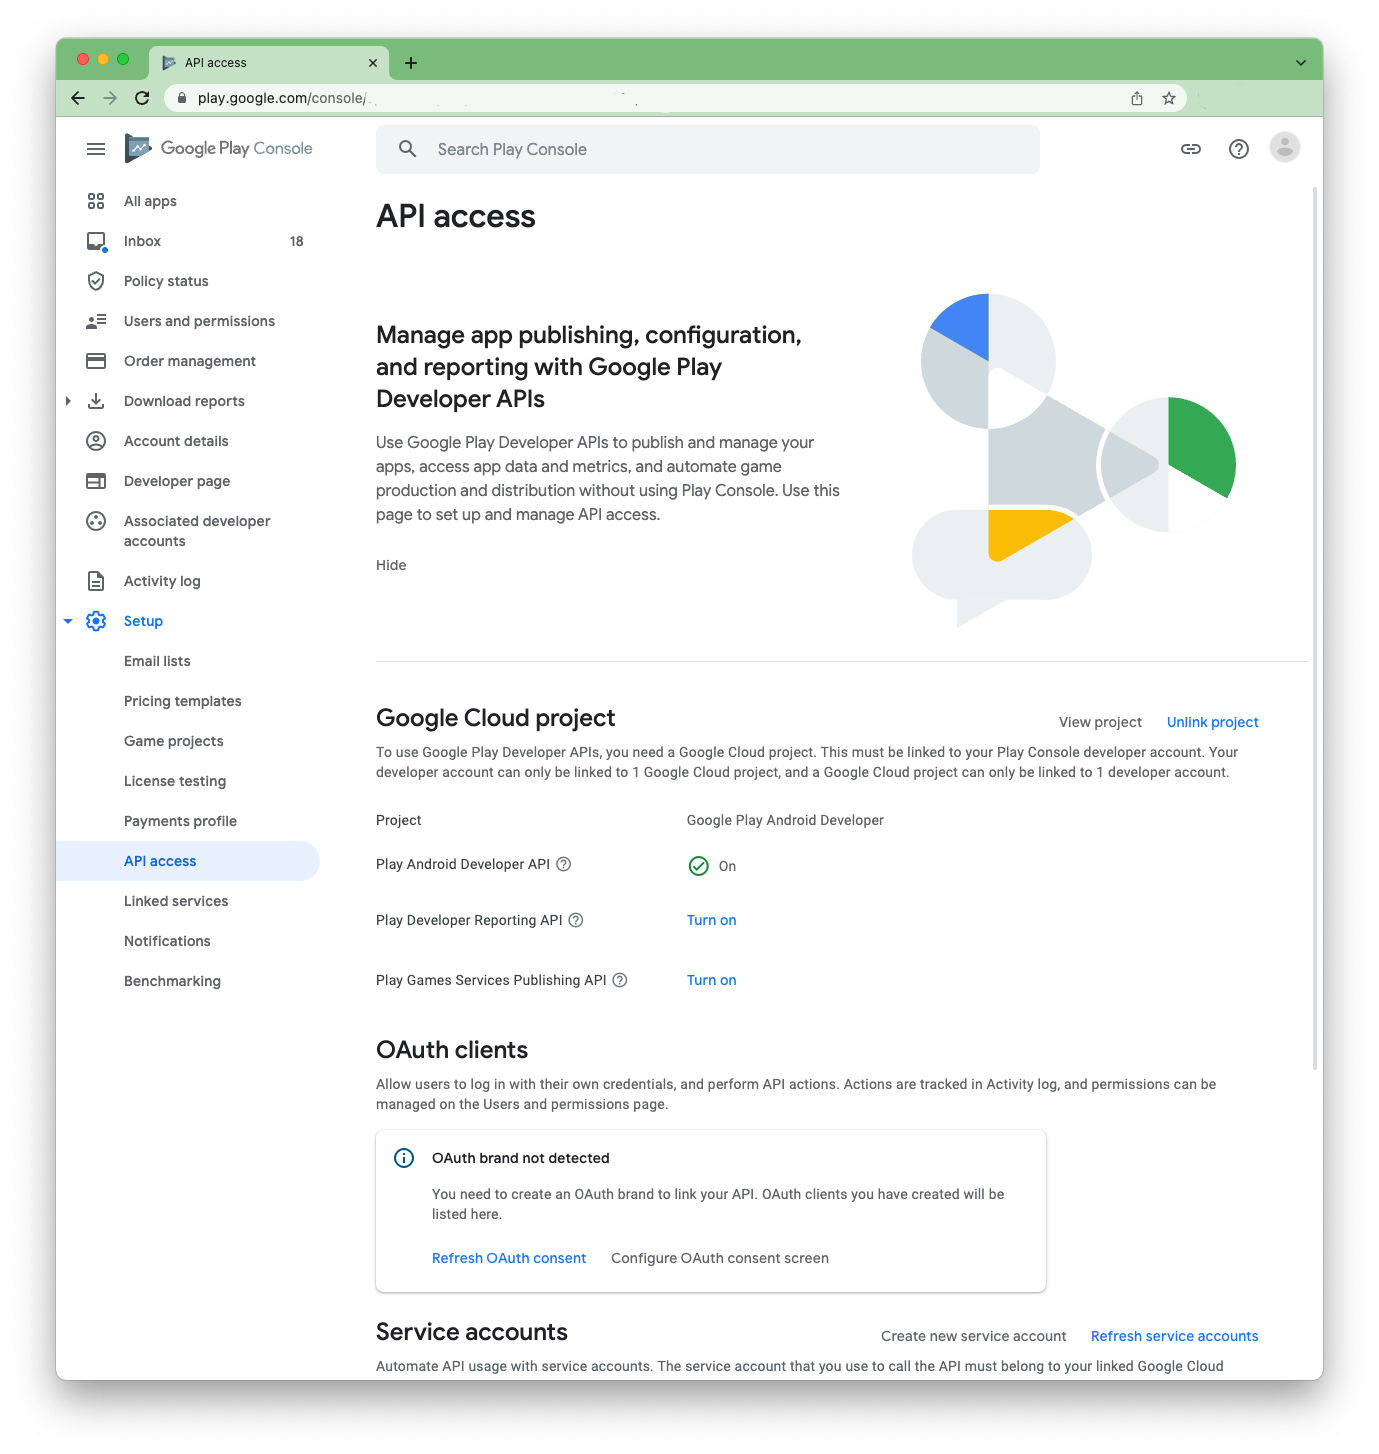
Google Play Console — Setup > API access - If you haven't already linked a Google Cloud project, you'll be prompted to do so and agree to the terms. Link to an existing project or create a new one.
- Click Create new service account. A link will take you to the Google Cloud Console in a new window.
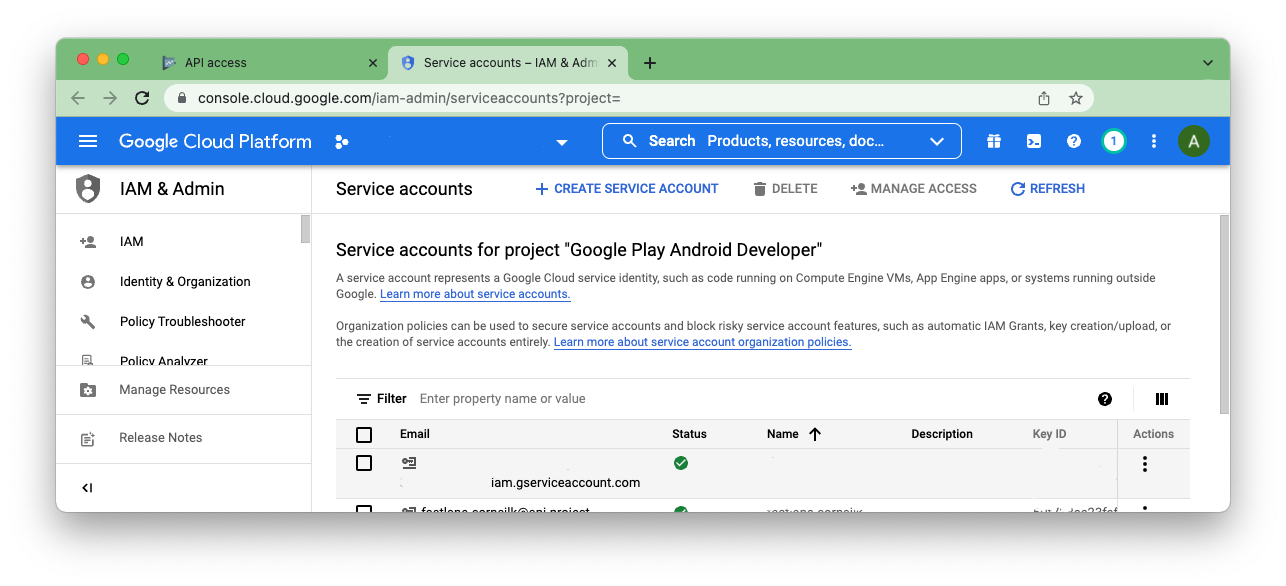
Google Cloud Console — Service Accounts - In the Google Cloud Console, click Create Service Account at the top of the page.
- Give the service account a descriptive name — something like revenuecat-play-access — so its purpose is obvious later.
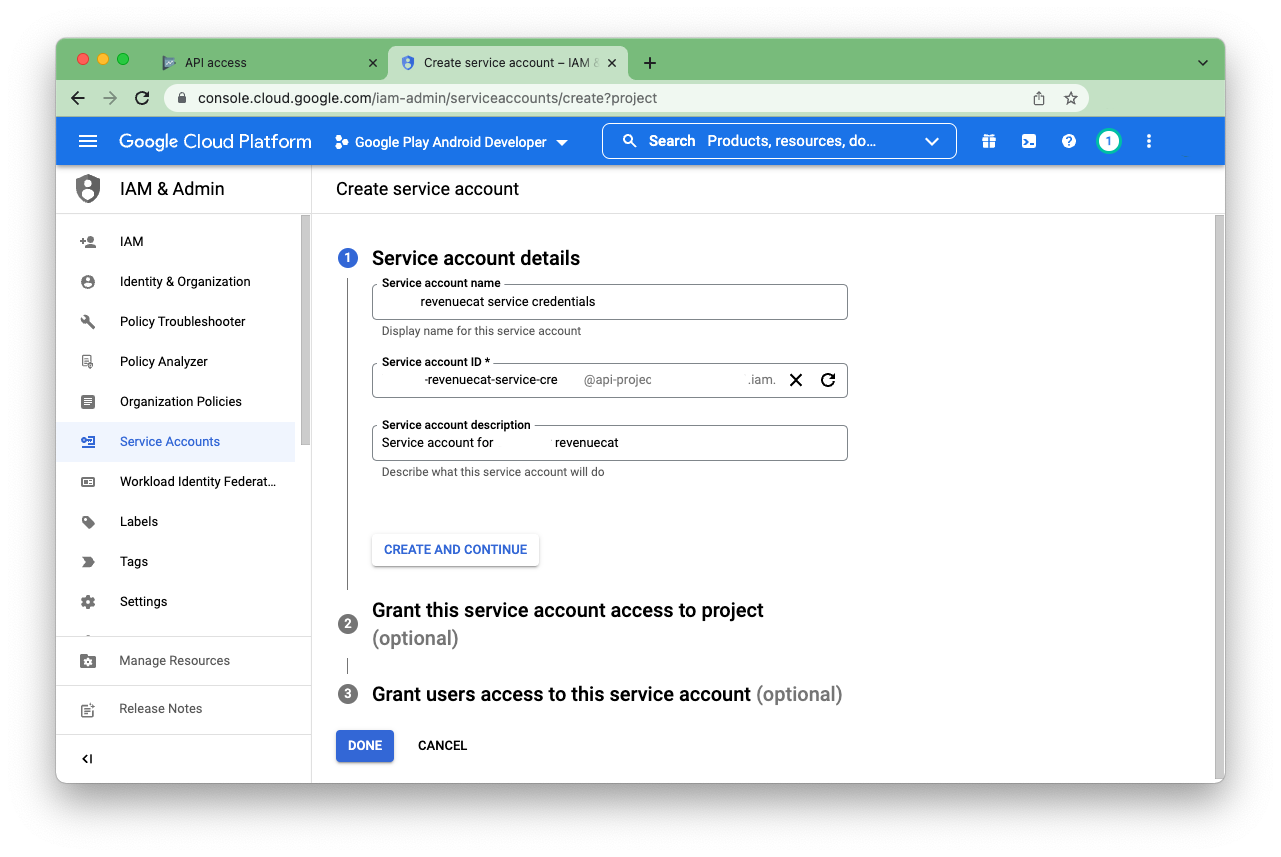
Google Cloud Console — Service Account details - Assign the following roles to the service account. Google has refined the required permissions over time — RevenueCat's current documentation recommends:
- Pub/Sub Admin — to enable real-time developer notifications from Google Play.
- Monitoring Viewer — to allow monitoring of the notification queue.
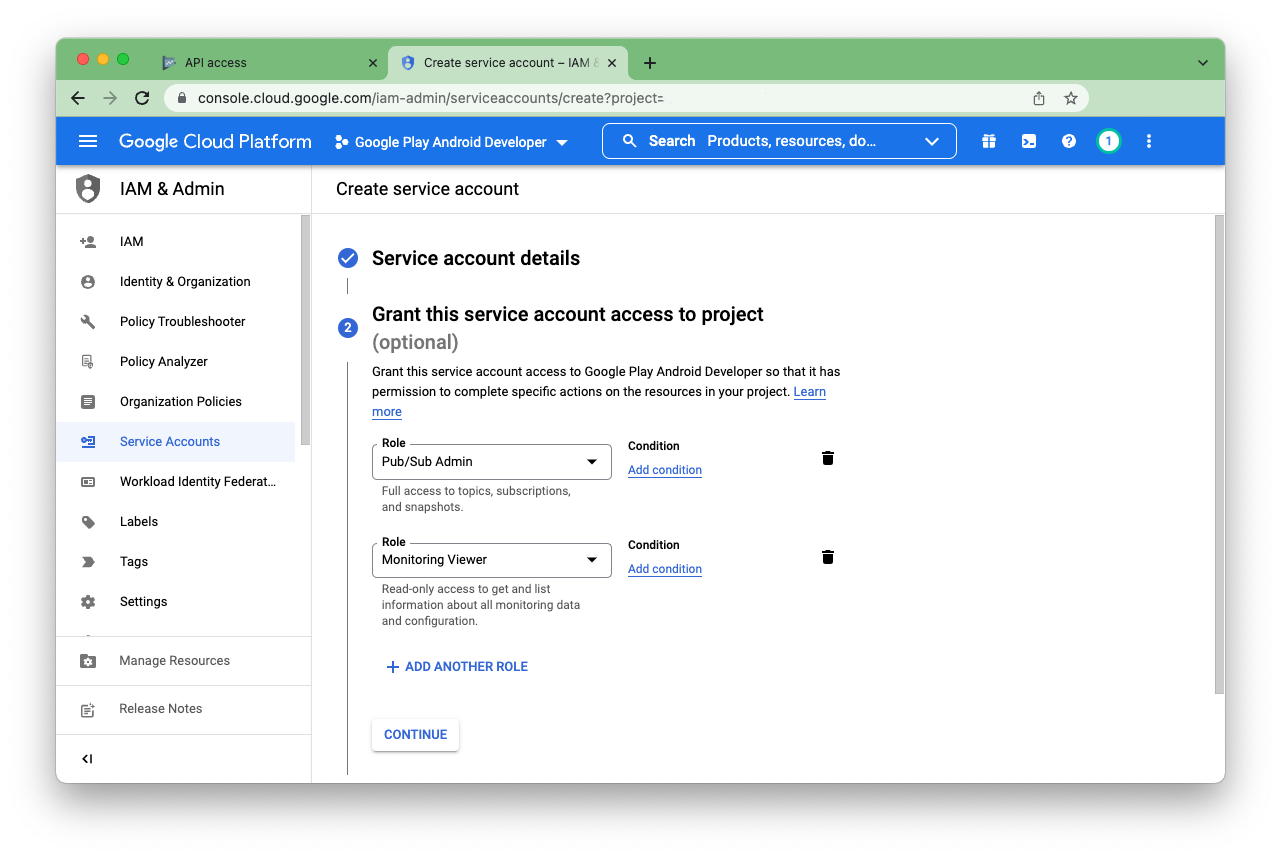
Google Cloud Console — Service Account roles - Click Continue, then Done.
- Refresh the service accounts list to see your new account.
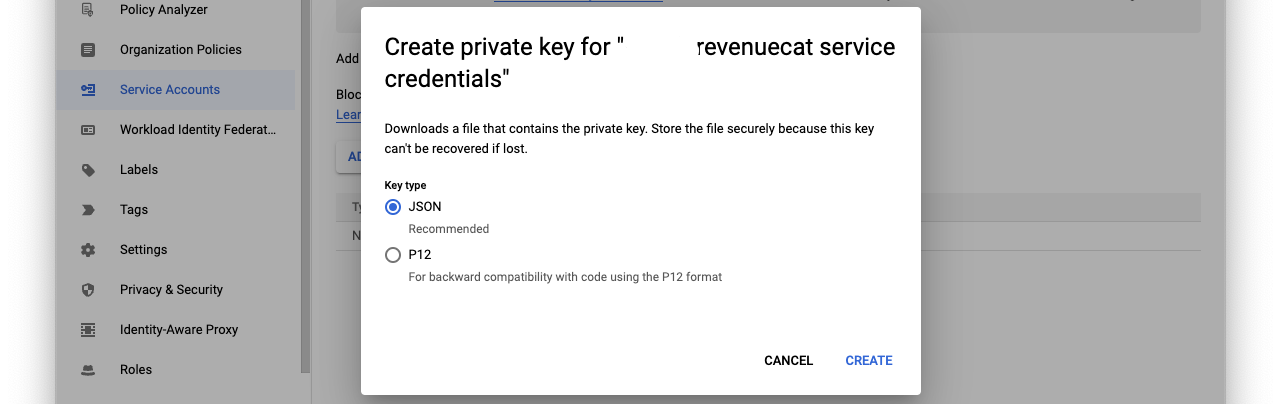
- Select Actions > Manage Keys on the new service account row.
- Select Add Key > Create new key, ensure JSON is selected, and click Create. The JSON file will download automatically — store it securely.

Google Cloud Console — Service Account key creation - Return to the Google Play Console. Under Setup > API access, find your new service account and click Grant permissions.
- Send the invite. Service accounts accept these automatically.
- You'll be redirected to Users and Permissions, where the service account should now appear as Active.
- Select the service account, add your app to its permissions, click Apply, then Save.
- Back in RevenueCat, navigate to Project Settings > Apps, open your Android app, and paste the contents of the downloaded JSON credentials file into the credentials field.
That's the Google side done. It's a lot of steps across two different Google consoles, and it hasn't got meaningfully simpler over the years. The upside is that once it's configured it's stable — you rarely need to revisit it.
Integrating RevenueCat into your FlutterFlow project
Adding the purchases_flutter package
In FlutterFlow, navigate to your project's pubspec.yaml settings (found under Custom Code or Settings depending on your FlutterFlow version) and add the purchases_flutter package. Use the latest stable version from pub.dev/packages/purchases_flutter. As of 2026, FlutterFlow supports adding pub.dev dependencies directly through the UI without needing to export and edit the project manually, which is a significant improvement over earlier workflows.
Initialising RevenueCat via a custom action
Create a custom action in FlutterFlow to initialise RevenueCat. This action should run once, early in your app's lifecycle — typically on your splash screen or in your main app widget's initialisation sequence. The current SDK initialisation pattern looks like this:
await Purchases.configure(
  PurchasesConfiguration('your_api_key_here'),
);
Use your iOS API key when running on iOS and your Android API key on Android. RevenueCat provides a way to detect the platform and pass the correct key, or you can use Flutter's Platform class to branch the logic. Store your API keys securely — do not hard-code them as plain strings in a public repository. FlutterFlow's environment variables or a secure remote config approach are both sensible options.
Triggering purchases and checking entitlements
Create additional custom actions for the two operations your app will perform most often: purchasing a product and checking whether a user currently has an active entitlement. RevenueCat's SDK makes both straightforward. A typical entitlement check retrieves the current customer info and inspects whether a named entitlement is active:
final customerInfo = await Purchases.getCustomerInfo();
final isPremium = customerInfo.entitlements.active.containsKey('premium');
Return the boolean result from your custom action and use it in FlutterFlow's conditional visibility or navigation logic to gate your premium features.
Testing in-app purchases
Testing is where many integrations stall. A few important points for 2026:
- iOS sandbox testing: Use a Sandbox Apple ID (created in App Store Connect under Users and Access) to test purchases on a real device without being charged. Simulator testing of purchases is unreliable and not recommended.
- Android testing: Google Play offers a licence testing mechanism and closed testing tracks. Add your test accounts as licence testers in the Play Console. You can also use Google Play's test purchase flow which processes without real charges.
- RevenueCat's debug overlay: RevenueCat provides a debug overlay you can enable during development that shows the current customer state, active entitlements, and available offerings in real time. Enable it with
Purchases.setLogLevel(LogLevel.debug);during development and remove it before release. - FlutterFlow test mode: Be aware that FlutterFlow's in-browser preview cannot execute native purchase flows. All purchase testing must happen on a real device running a build of your app.
Common pitfalls to watch for
- Products not appearing: New products in App Store Connect and Google Play can take time to propagate — sometimes several hours. If your offerings come back empty, wait and try again before assuming a code error.
- Mismatched product identifiers: The identifier string in RevenueCat must exactly match the one in App Store Connect and the Play Console. Copy and paste rather than typing.
- Missing agreements: Apple requires an active Paid Applications Agreement in App Store Connect. Google requires your app to have at least one published release (even to a closed track) before the billing API will function correctly.
- SDK version conflicts: If you're using other FlutterFlow packages that depend on older versions of Flutter dependencies, you may encounter version conflicts with
purchases_flutter. Check the pub.dev compatibility matrix and resolve conflicts in your pubspec before building. - Restore purchases: Apple's guidelines require a "Restore Purchases" option in your app. Implement a custom action that calls
Purchases.restorePurchases()and link it to a visible button.
The most common reason in-app purchases fail in production isn't a code bug — it's a configuration mismatch between the store console and RevenueCat, or a missing agreement with Apple or Google. Get the plumbing right first, then write the code.
Final thoughts
The fundamental complexity of this integration hasn't disappeared in 2026 — you're still coordinating across Apple, Google, RevenueCat, and FlutterFlow, and each platform updates its console and APIs on its own schedule. What has improved is the tooling on all sides: FlutterFlow handles custom code more gracefully, RevenueCat's SDK is more robust and better documented, and the community of FlutterFlow developers who have shipped monetised apps is large enough that most problems have a documented solution somewhere.
Treat this as a living configuration rather than a one-time setup. Bookmark RevenueCat's changelog and FlutterFlow's release notes, and budget time to revisit the integration whenever either platform ships a major update. The effort is front-loaded — once it's working, it tends to stay working.